The Perfect Artisan Pizza Dough Recipe
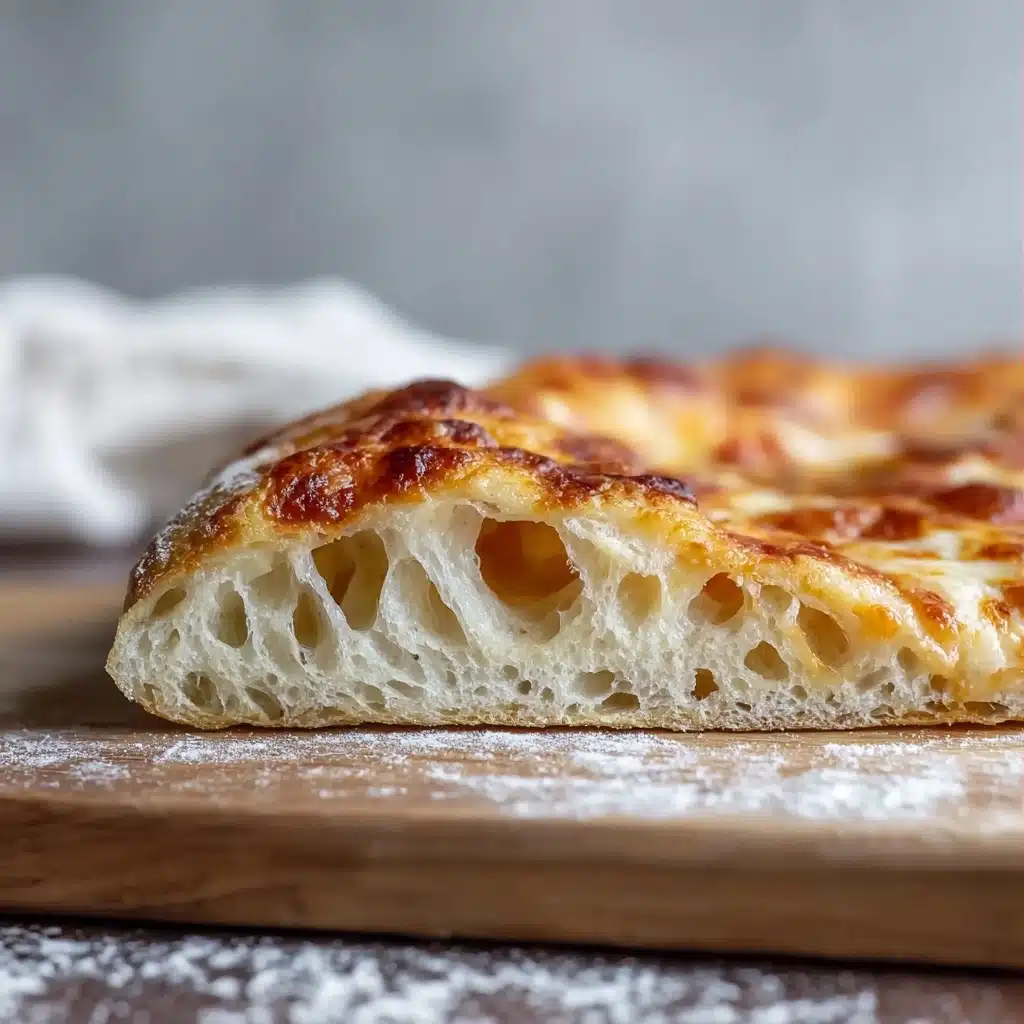
If you have ever dreamed of crafting a truly memorable pizza from scratch, then you are in for a treat with The Perfect Artisan Pizza Dough. This recipe captures the essence of authentic Italian pizza with a beautifully crispy crust, tender crumb, and just the right chew. It’s a simple yet magical dough that combines just a few humble ingredients to create a base that acts as the perfect canvas for all your favorite toppings. Once you master this, you’ll wonder how you ever settled for store-bought dough again!
Ingredients You’ll Need
Believe it or not, the magic of The Perfect Artisan Pizza Dough starts with a handful of pantry staples that work together to create incredible texture and flavor. Each ingredient plays a vital role—from the flour that builds structure to the yeast that gently wakes the dough to life.
- All-purpose flour (3 ¾ cups plus 2 tbsp / 500g): Provides the perfect balance of protein for gluten development, ensuring a dough that’s airy but strong.
- Warm water (1 ½ cups plus 2 tbsp / 375g), divided: Activates the yeast and hydrates the flour for a soft, pliable dough.
- Active dry yeast (¼ tsp / 1g): The small amount creates just enough rise and fermentation for flavor without overpowering.
- Fine salt (1 ½ tsp / 10g): Not only seasons the dough but also tightens gluten structure for that wonderful chew.
How to Make The Perfect Artisan Pizza Dough
Step 1: Mixing Flour and Water
Start by combining the flour with most of the warm water in a large bowl. Stir them until just incorporated—don’t worry about perfection here. Then, cover the bowl and let it rest for 20 minutes. This resting period, called autolyse, allows the flour to fully absorb the water, which is key to developing flavor and gluten structure later.
Step 2: Activating the Yeast
While the flour rests, sprinkle the yeast over the remaining tablespoon of warm water. Let it sit for a few minutes until it dissolves and becomes frothy—a sign that the yeast is alive and ready to work its magic in your dough.
Step 3: Combining Ingredients and Developing the Dough
Sprinkle the salt over the hydrated flour mixture, then pour in the yeast water. Using wet hands, gently fold the dough over itself several times. This technique blends everything without deflating the dough while beginning gluten development. Cover and rest for about an hour to allow fermentation to start—this step enhances flavor and texture.
Step 4: Strengthening the Dough
Now it’s time to build strength into your pizza dough. With slightly wet hands, stretch a section of dough upwards and fold it back down toward the center. Rotate the bowl and repeat about four or five times. This stretch-and-fold method strengthens the gluten network, giving the final crust that perfect balance of chewiness and lightness. Cover and let it ferment at room temperature for five to six hours, or place it in the fridge for up to two days to develop even richer flavor.
Step 5: Dividing and Shaping
After fermentation, transfer the dough to a floured surface and divide it into two equal portions. Gently shape each into a round ball by folding the edges inward, creating surface tension that helps the dough rise evenly. Cover and rest at room temperature for one hour to relax the gluten and prepare for shaping.
Step 6: Preparing to Bake
Preheat your oven to the highest temperature possible, ideally 500°F, with a baking steel, pizza stone, or an inverted baking sheet inside. Allow at least 45 minutes for the surface to fully heat so your crust bakes evenly and becomes delightfully crispy.
Step 7: Shaping and Baking
Flatten one dough ball into a 12-inch circle, leaving the edges thick for that classic puffy crust. Transfer it onto a floured pizza peel, add your favorite sauce and toppings, then slide it onto the hot baking surface. Bake for about five minutes, then switch to broil for another two to four minutes or until the cheese bubbles and the crust boasts those signature golden-brown, blistered spots. Repeat with the second dough ball and get ready to enjoy!
How to Serve The Perfect Artisan Pizza Dough

Garnishes
The beauty of The Perfect Artisan Pizza Dough is how well it takes on any topping. Fresh basil leaves add a burst of herbal aroma, while a drizzle of high-quality olive oil brings richness. Sprinkle sea salt flakes over the crust edges for an extra crunch and flavor burst that invites everyone to dig in.
Side Dishes
Serve your artisan pizza dough creations with simple side salads like arugula tossed with lemon and olive oil or roasted garlic and tomato bruschetta. These light accompaniments balance the hearty pizza while complementing its rustic charm perfectly.
Creative Ways to Present
Why not turn your pizza into a centerpiece? Try folding slices into a calzone or designing mini personal pizzas for a fun communal dining experience. You can also experiment by making flatbreads with toppings or using leftover dough to craft rustic breadsticks, making every bit count!
Make Ahead and Storage
Storing Leftovers
If you have any leftover dough, store it tightly wrapped in the refrigerator for up to two days. This resting period helps develop deeper flavors and makes the dough easier to handle when you’re ready to bake again.
Freezing
For longer storage, freeze dough balls individually wrapped in plastic wrap and placed inside freezer bags. They keep wonderfully for up to three months. When you’re ready, thaw overnight in the refrigerator and let come to room temperature before shaping.
Reheating
Leftover baked pizza can be reheated in a hot oven or on a cast-iron skillet to rejuvenate its crispiness. Avoid the microwave as it tends to make the crust chewy and soggy instead of delightfully crunchy.
FAQs
Can I use bread flour instead of all-purpose flour?
Absolutely! Bread flour has higher protein content, which can result in an even chewier crust. However, all-purpose flour works perfectly for The Perfect Artisan Pizza Dough delivering a balanced texture that’s soft inside and crisp outside.
Why is the dough sticky and how do I handle it?
This dough has a high hydration level, making it stickier than traditional recipes. Wet your hands or lightly oil them when handling, and dust surfaces with flour to keep things manageable without drying out the dough.
Can I speed up the fermentation process?
While you can warm the dough slightly to hasten fermentation, slow fermentation at room temperature or in the refrigerator is ideal for flavor development. Rushing may produce less complex taste and texture.
What’s the best oven setup for baking this pizza?
Using a preheated baking steel or pizza stone helps mimic a professional pizza oven by distributing intense heat evenly. An inverted baking sheet can work in a pinch. Make sure your oven is fully preheated for a beautifully blistered crust.
Can I make this dough vegan?
Yes! Since this recipe contains no dairy or eggs, it is naturally vegan. Just choose your favorite toppings accordingly, and you’ll have a delicious plant-based pizza ready to enjoy.
Final Thoughts
Making The Perfect Artisan Pizza Dough at home is one of those rewarding kitchen adventures that pays off with every bite. The process might seem detailed, but it’s really all about loving the dough and letting it do its thing. Once you experience that golden crust with soft, airy interior, topped however you love, you’ll see why this dough became one of my absolute favorites to share with friends and family. So roll up your sleeves, embrace a little flour on your hands, and start your own pizza journey today!
PrintThe Perfect Artisan Pizza Dough Recipe

This recipe guides you through making the perfect artisan pizza dough with a high hydration level for a crispy, bubbly crust. Using simple ingredients and a slow fermentation process, you’ll achieve a flavorful, airy base ready for your favorite toppings.
- Prep Time: 15 minutes plus 5-6 hours fermentation
- Cook Time: 10 minutes
- Total Time: 6 hours 25 minutes
- Yield: 2 twelve-inch pizzas 1x
- Category: Bread & Dough
- Method: Baking
- Cuisine: Italian
- Diet: Vegetarian
Ingredients
Dry Ingredients
- 3 ¾ cups plus 2 tbsp all-purpose flour (500g)
- ¼ tsp active dry yeast (1g)
- 1 ½ tsp fine salt (10g)
Wet Ingredients
- 1 ½ cups plus 2 tbsp warm water, divided (375g)
Instructions
- Mix the flour and water: In a large mixing bowl, combine the flour with all but one tablespoon of the warm water, stirring until just incorporated. Cover and let the mixture rest for 20 minutes to allow the flour to absorb the liquid.
- Activate the yeast: Sprinkle the yeast over the remaining warm water and let it dissolve for a few minutes, activating the yeast.
- Combine ingredients and develop the dough: Sprinkle the salt over the flour-water mixture, then pour in the yeast mixture. Using wet hands, gently fold the dough over itself multiple times until all ingredients are well incorporated. Cover and let rest for about an hour.
- Strengthen the dough: With lightly wet hands, lift a section of the dough, stretch it upwards, and fold it over the center. Rotate the bowl and repeat this four to five times to build structure. Cover and ferment at room temperature for five to six hours, or refrigerate up to two days for deeper flavor development.
- Divide and shape: Transfer the dough to a floured surface, divide it into two equal portions, and gently shape each into a round ball by folding the edges inward. Cover and let rest at room temperature for one hour before using.
- Prepare for baking: Preheat your oven to 500°F (or the highest setting) with a baking steel, pizza stone, or inverted baking sheet inside. Heat for at least 45 minutes to ensure a crispy crust.
- Shape and bake: Flatten one dough ball into a 12-inch round, leaving a thick edge for the crust. Place on a floured pizza peel, add sauce and toppings as desired, and slide it onto the hot baking surface. Bake for about five minutes, then broil for two to four minutes until the cheese is bubbly and the crust is golden brown with blistered spots. Repeat with the other dough ball.
Notes
- The dough will be sticky due to its high hydration; wet hands or a bit of olive oil help handle it.
- If refrigerating the dough, allow it to sit at room temperature for about 30 minutes before shaping.
- For extra crispiness, let the baked pizza rest a few minutes before slicing.
- Leftover dough can be refrigerated up to two days or frozen for three months.
Nutrition
- Serving Size: ¼ of a 12 inch pizza
- Calories: 228
- Sugar: 0.2g
- Sodium: 488mg
- Fat: 0.6g
- Saturated Fat: 0.1g
- Unsaturated Fat: 0.4g
- Trans Fat: 0g
- Carbohydrates: 48g
- Fiber: 1.7g
- Protein: 6.5g
- Cholesterol: 0mg
Keywords: artisan pizza dough, homemade pizza dough, pizza crust recipe, crispy pizza dough, high hydration dough