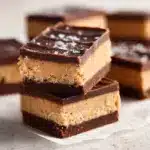
No-Bake Peanut Butter Protein Bars Recipe
If you are craving a delicious, wholesome treat that fuels your day without any oven time, then this No-Bake Peanut Butter Protein Bars Recipe is about to become your new best friend. Packed with creamy peanut butter, hearty oats, and protein powder, these bars strike the perfect balance of rich flavor and satisfying energy. Whether you need a quick snack post-workout or an on-the-go breakfast, these bars deliver a chewy, nutty delight topped with a luscious layer of dark chocolate that sets just right in your fridge. Let me take you through every step so you can whip up these crowd-pleasing bars with ease and confidence.
Ingredients You’ll Need
These ingredients are straightforward, pantry-friendly, yet each brings something special to the table—in taste, texture, or nutrition. Together, they create a bar that is chewy, nourishing, and indulgently sweet without being over the top.
- 1 ½ cups creamy no-stir peanut butter: Choose a natural, smooth variety for the best creamy texture and classic nutty flavor.
- ¾ cup protein powder (vanilla or chocolate): This is the heart of your bars’ protein punch; pick your favorite flavor to customize your bars’ taste.
- ¼ cup honey or maple syrup: A natural sweetener to bind and brighten the mixture with gentle sweetness.
- 1 cup rolled oats: Provides hearty chewiness and fiber, making each bar feel substantial and satisfying.
- ¼ cup dark chocolate chips: Adds a rich and slightly bittersweet contrast that melts beautifully on top.
- Optional: Sea salt for topping: A sprinkle of fine salt balances the sweetness and intensifies all flavors.
How to Make No-Bake Peanut Butter Protein Bars Recipe
Step 1: Make the Peanut Butter Base
Begin by grabbing a large mixing bowl. Combine the creamy peanut butter, protein powder, honey or maple syrup, and rolled oats. Stir everything thoroughly—the mixture will be thick but cohesive enough to press down evenly. This base is where all the magic happens, providing richness from the peanut butter and a satisfying chew from the oats.
Step 2: Press into the Pan
Line an 8×8-inch baking dish with parchment paper—it makes removing the bars a breeze later. Now, transfer your peanut butter mixture into the dish and firmly press it down to create an even, compact layer. This step ensures your bars hold together nicely when sliced.
Step 3: Melt the Chocolate
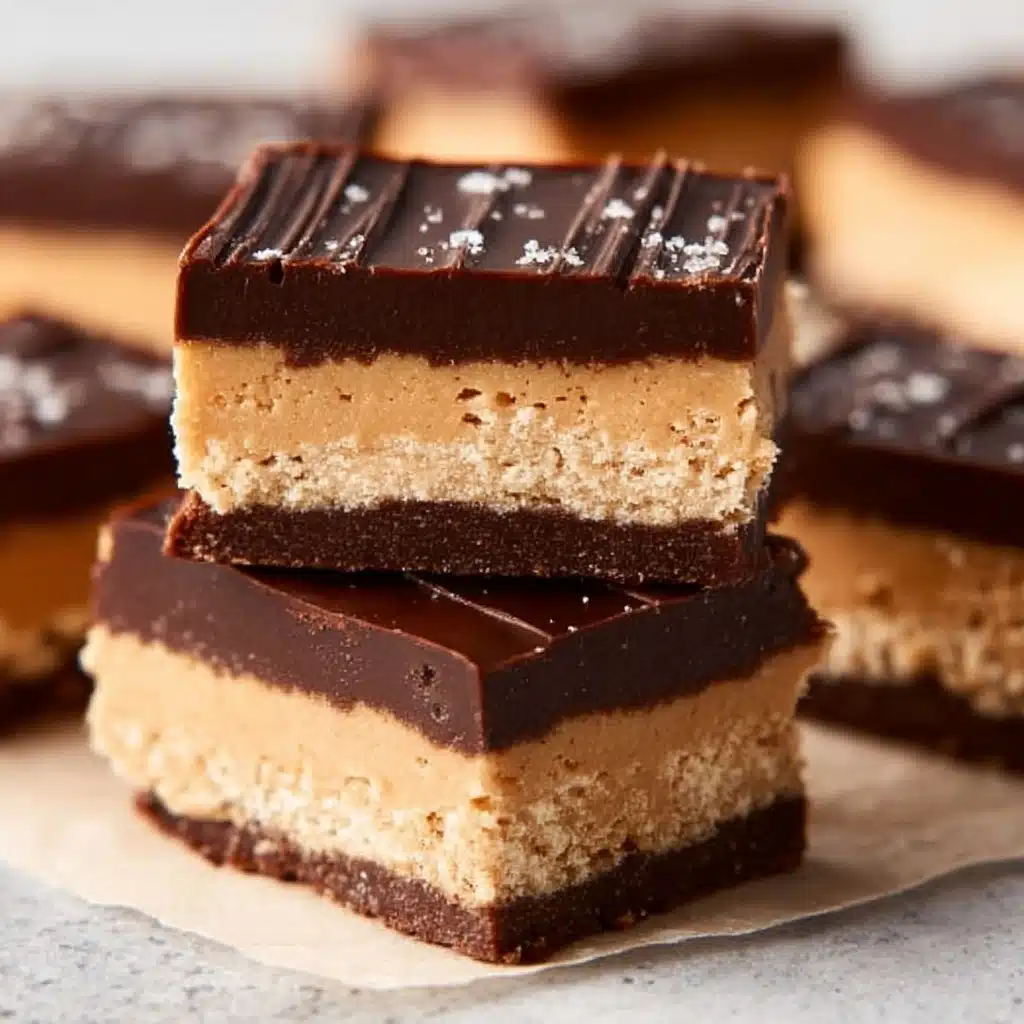
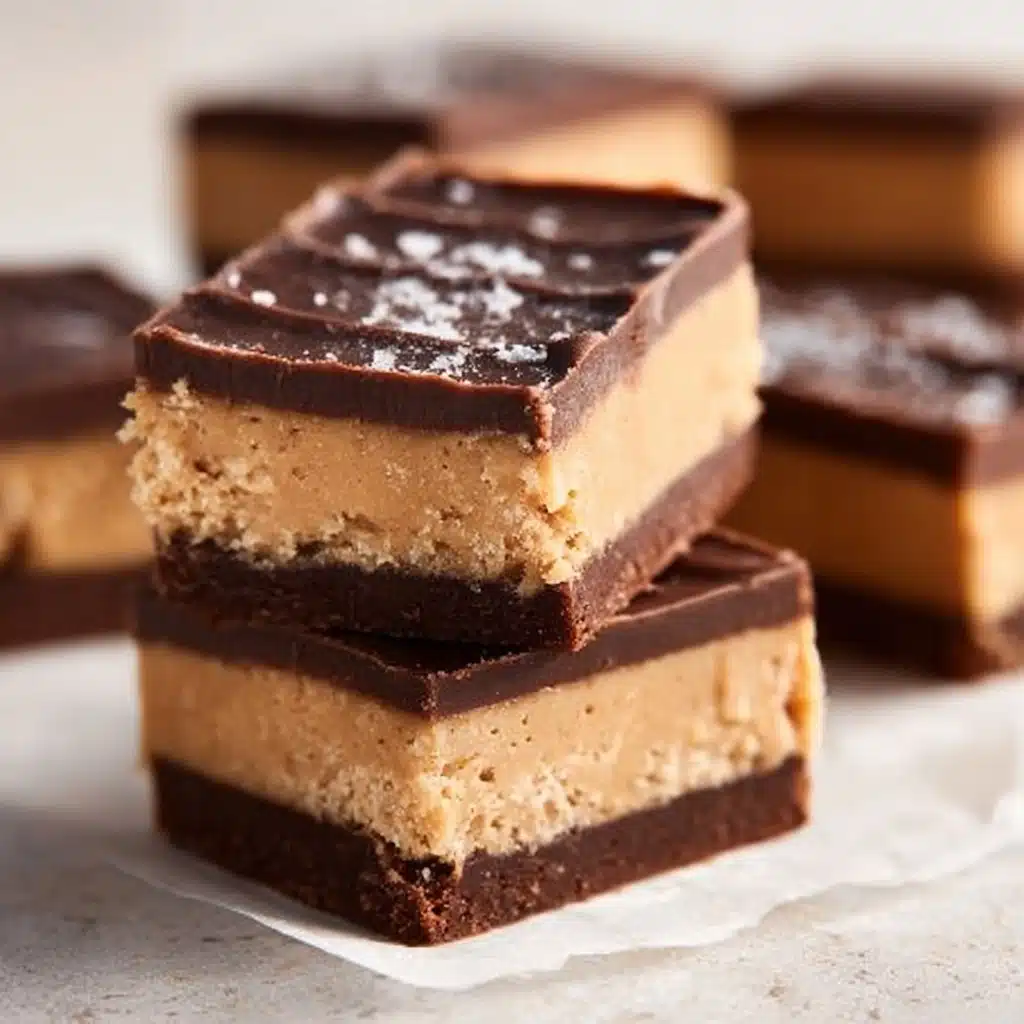
Place your dark chocolate chips in a microwave-safe bowl and melt them in 30-second bursts. Make sure to stir between each heating session for smooth, gooey chocolate without burning. Once melted to perfection, pour the chocolate over your peanut butter base and spread it evenly with a spatula. This glossy chocolate layer is the indulgent finishing touch that elevates the whole bar.
Step 4: Chill
Pop the baking dish into your fridge for at least one hour. This chilling time allows the chocolate to set firmly and the peanut butter layer to become nicely packed. It’s key for that perfect sliceable texture everyone loves.
Step 5: Slice & Serve
Once the bars are fully set and chilled, use a sharp knife to cut them into 12 to 16 equally sized pieces. Transfer to an airtight container, keep refrigerated, and enjoy your homemade protein-packed snack whenever hunger strikes.
How to Serve No-Bake Peanut Butter Protein Bars Recipe
Garnishes
Add a sprinkle of flaky sea salt on top right after spreading the chocolate to create a delightful contrast of salty and sweet that awakens your taste buds. Crushed nuts or a drizzle of additional peanut butter can also turn these bars into little masterpieces.
Side Dishes
Pair these bars with a cup of black coffee or a cold glass of almond milk for a simple, balanced snack. They also work well alongside a fresh fruit salad, complementing the natural sweetness and adding variety to your energy boost.
Creative Ways to Present
Cut the bars into bite-sized cubes, skewer them with fruit or marshmallows for an on-the-go snack pop, or wrap individual bars in parchment and twine for an impressive homemade gift. Layer them in a clear container for a visually enticing treat station at your next gathering.
Make Ahead and Storage
Storing Leftovers
Keep your leftover bars fresh by storing them in an airtight container in the fridge. They should stay good for up to a week, retaining their great texture and flavor with little effort.
Freezing
For longer storage, wrap individual bars in plastic wrap or parchment paper and place them in a freezer-safe bag. They freeze beautifully and can be enjoyed anytime by simply thawing for 15-20 minutes at room temperature.
Reheating
Since these bars are intended to be eaten chilled, reheating is not necessary. However, if you prefer your chocolate a bit melty, warm them gently for 10-15 seconds in the microwave, just enough to soften the top without losing the bar’s structural integrity.
FAQs
Can I use crunchy peanut butter instead of creamy?
Absolutely! Crunchy peanut butter will add an extra layer of texture to your bars, making every bite even more interesting. Just be sure to mix well to incorporate all the pieces.
What protein powder works best for this recipe?
Vanilla or chocolate-flavored whey or plant-based protein powders work wonderfully. Choose one you enjoy drinking on its own for the best flavor results.
Are these bars suitable for vegans?
Yes, just swap the honey for maple syrup and use vegan-friendly protein powder and chocolate chips, and you’ll have a fully plant-based snack.
How can I make these bars more crunchy?
Try stirring in some chopped nuts or seeds to the batter before pressing it into the pan. Toasting the oats lightly also adds a pleasant crunch and deeper flavor.
Can I substitute the rolled oats with gluten-free oats?
Definitely! Using gluten-free oats will maintain the chewiness and texture while keeping the bars gluten-free if needed.
Final Thoughts
I hope you feel inspired to whip up this No-Bake Peanut Butter Protein Bars Recipe soon because it really is one of those simple yet life-changing treats that stick with you. Whether for a busy morning, a post-exercise boost, or an anytime snack, these bars bring together flavor, nutrition, and ease like no other. Grab your ingredients, follow these steps, and treat yourself to something truly satisfying today!
PrintNo-Bake Peanut Butter Protein Bars Recipe
These No-Bake Peanut Butter Protein Bars are a delicious, healthy snack perfect for on-the-go energy. Made with creamy peanut butter, protein powder, oats, honey, and dark chocolate, they blend wholesome ingredients into a convenient, no-bake treat that’s easy to prepare and packed with protein to keep you fueled.
- Prep Time: 10 minutes
- Cook Time: 0 minutes
- Total Time: 1 hour 10 minutes
- Yield: 12 bars 1x
- Category: Snack, Protein Bar
- Method: No-Bake, Refrigeration
- Cuisine: American
- Diet: Vegetarian
Ingredients
Main Ingredients
- 1 ½ cups creamy no-stir peanut butter
- ¾ cup protein powder (vanilla or chocolate)
- ¼ cup honey or maple syrup
- 1 cup rolled oats
- ¼ cup dark chocolate chips
Optional
- Sea salt for topping
Instructions
- Make the Peanut Butter Base: In a large bowl, combine the peanut butter, protein powder, honey or maple syrup, and rolled oats. Stir thoroughly until all ingredients are well incorporated into a thick, cohesive mixture that holds together easily.
- Press into the Pan: Line an 8×8-inch baking dish with parchment paper. Spread and firmly press the peanut butter mixture evenly into the bottom of the pan to create a uniform layer.
- Melt the Chocolate: Place the dark chocolate chips in a microwave-safe bowl and heat in 30-second increments, stirring after each interval until fully melted and smooth. Pour the melted chocolate evenly over the peanut butter base and spread with a spatula.
- Chill: Refrigerate the assembled bars for at least 1 hour to allow the chocolate to set and the bars to become firm enough to slice.
- Slice & Serve: Once the chocolate topping is solid, remove the bars from the pan and cut into 12–16 pieces. Store bars in an airtight container in the refrigerator for up to one week or freeze for longer storage.
Notes
- Flavor Additions: Sprinkle a pinch of sea salt on top of the melted chocolate before chilling to enhance the flavor with a salty contrast.
- Vegan Option: Use maple syrup instead of honey, choose dairy-free chocolate chips, and substitute the protein powder with a plant-based alternative to keep these bars vegan friendly.
- Storage: Keep bars refrigerated for up to a week or freeze for extended freshness.
Nutrition
- Serving Size: 1 bar (based on 12 bars)
- Calories: 215
- Sugar: 8g
- Sodium: 120mg
- Fat: 14g
- Saturated Fat: 3g
- Unsaturated Fat: 10g
- Trans Fat: 0g
- Carbohydrates: 17g
- Fiber: 3g
- Protein: 9g
- Cholesterol: 0mg
Keywords: no-bake protein bars, peanut butter bars, healthy snack, protein snack, no-bake dessert, easy protein bar recipe