Mummy Oreo Balls Recipe
Introduction
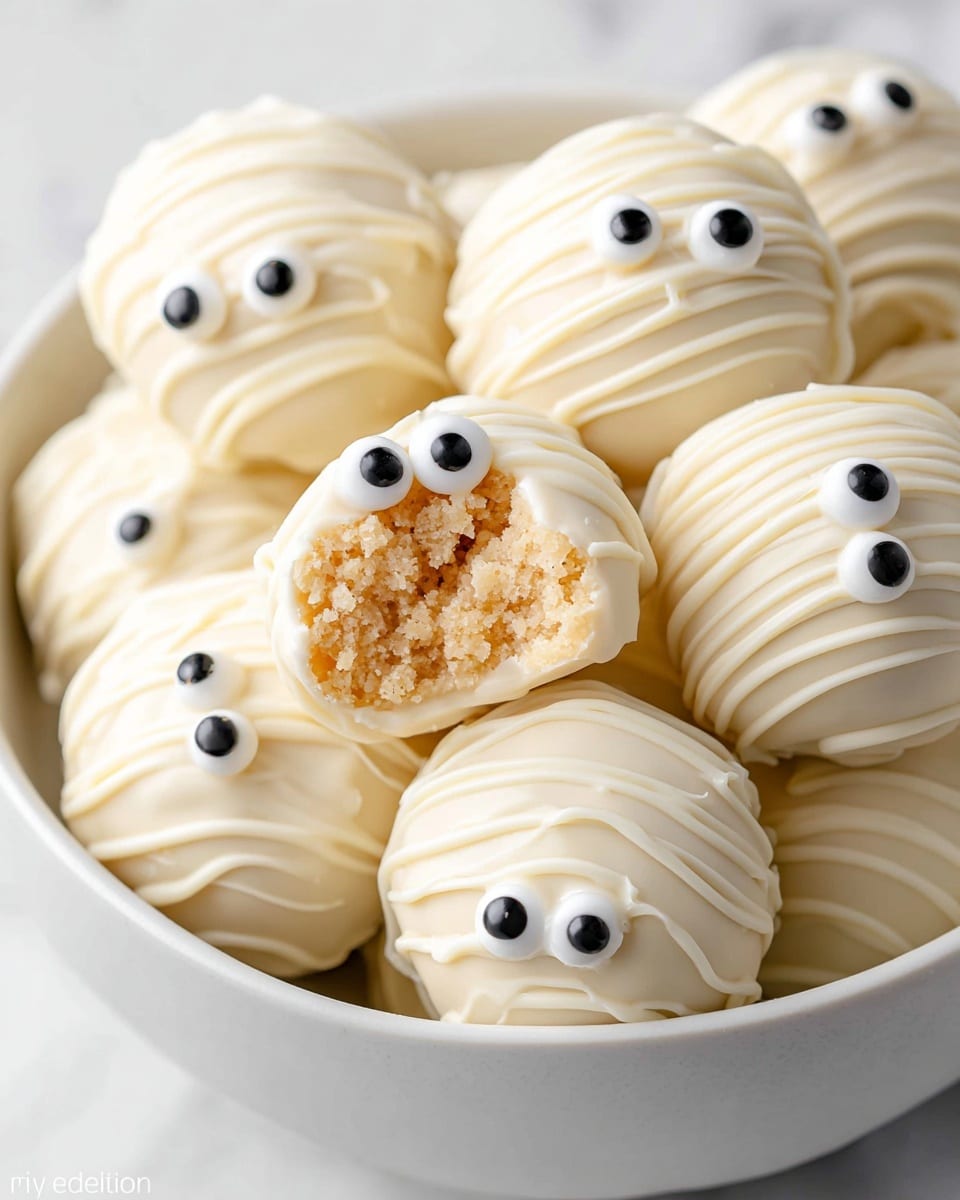
Mummy Oreo Balls are a fun and spooky treat perfect for Halloween or any festive occasion. These bite-sized snacks combine crunchy Golden Oreos with creamy filling, coated in smooth vanilla candy melts and decorated with candy eyes for a playful mummy effect.

Ingredients
- 20 Golden Oreos
- 4 ounces cream cheese, softened to room temperature
- 10 ounces vanilla candy melts or dipping wafers
- 1 package candy eyes
Instructions
- Step 1: Line a large baking sheet with parchment paper and set aside.
- Step 2: Pulse the Oreos in a food processor until they become very fine crumbs.
- Step 3: In a large mixing bowl, combine the cookie crumbs and softened cream cheese. Stir until smooth and well combined.
- Step 4: Use a cookie scoop to form the mixture into about 1-inch balls. Roll each ball between your palms until smooth. Place the balls on the prepared baking sheet and freeze for 30 minutes to set.
- Step 5: Melt the vanilla candy melts according to package instructions and pour into a small bowl.
- Step 6: Working one at a time, dip each Oreo ball into the melted chocolate using a fork to turn and coat. Tap off any excess chocolate. The Oreo ball should rest on top of the fork without poking the truffle.
- Step 7: Place the coated balls back on the baking sheet. Pour remaining chocolate into a ziplock bag, cut a small hole in one corner, and drizzle chocolate over the balls to create a mummy wrap effect.
- Step 8: Attach two candy eyes to each ball. If the chocolate hardens too quickly, add a small dot of melted chocolate to the back of the eyes to help them stick.
- Step 9: Refrigerate the finished Oreo balls for 15-20 minutes to allow the chocolate to set completely.
- Step 10: Serve and enjoy your spooky Mummy Oreo Balls!
Tips & Variations
- Use regular Oreos or chocolate Oreos if you prefer a different flavor.
- Try coloring white candy melts with a few drops of food coloring for different mummy designs.
- For a different look, use mini marshmallows instead of candy eyes.
- If you don’t have a food processor, crush the Oreos in a ziplock bag with a rolling pin until finely ground.
Storage
Store the Mummy Oreo Balls in an airtight container in the refrigerator. They will stay fresh for up to 5 days. If stacking them, place parchment paper between layers to prevent sticking. When ready to eat, you can enjoy them cold or let them sit at room temperature for a few minutes before serving.
How to Serve
Serve this delicious recipe with your favorite sides.
FAQs
Can I make these Oreo balls ahead of time?
Yes, these treats can be prepared a day or two in advance and stored in the refrigerator until ready to serve.
What can I substitute for candy eyes?
If candy eyes are unavailable, you can use mini chocolate chips, small dots of frosting, or simply omit eyes and enjoy them as coated Oreo balls.
PrintMummy Oreo Balls Recipe

Mummy Oreo Balls are a fun and festive no-bake Halloween treat made from crushed Golden Oreos mixed with cream cheese, dipped in vanilla candy melts, and decorated with candy eyes to resemble mummies. They’re easy to make, creamy, and perfect for parties or a spooky snack.
- Prep Time: 15 minutes
- Cook Time: 0 minutes
- Total Time: 45 minutes
- Yield: Approximately 20 Oreo balls 1x
- Category: Dessert
- Method: No-Cook
- Cuisine: American
Ingredients
Base Ingredients
- 20 Golden Oreos
- 4 ounces cream cheese, softened to room temperature
Coating and Decoration
- 10 ounces vanilla candy melts or dipping wafers
- 1 package candy eyes
Instructions
- Prepare Baking Sheet: Line a large baking sheet with parchment paper and set it aside to keep the Oreo balls from sticking while they chill.
- Make Oreo Crumbs: Pulse the Golden Oreos in a food processor until they become very fine crumbs, resembling sand.
- Combine Ingredients: Pour the Oreo crumbs into a large mixing bowl and add the softened cream cheese. Stir together until well combined and smooth, forming a dough-like mixture.
- Form Balls: Using a cookie scoop or spoon, form the mixture into roughly 1-inch balls. Roll each ball between your palms to make smooth spheres. Place them on the prepared baking sheet.
- Freeze the Balls: Transfer the Oreo balls into the freezer for about 30 minutes. This step firms them up for easier dipping.
- Melt Candy Coating: Melt the vanilla candy melts according to package directions, typically in a microwave or double boiler, until smooth.
- Dip the Balls: Using a fork, dip each chilled Oreo ball into the melted white chocolate, coating it fully. Let excess chocolate drip off by tapping on the side of the bowl. Note that the truffle sits on top of the fork without poking through.
- Decorate: Place the coated balls back onto the baking sheet. Pour remaining melted chocolate into a plastic bag, cut a small hole in the corner, and drizzle strips over each ball to create a mummy wrap effect. Press two candy eyes onto each ball while the drizzle is still wet. If chocolate hardens quickly, use a small dab of melted chocolate to stick the eyes on.
- Set the Coating: Refrigerate the decorated Oreo balls for 15-20 minutes, allowing the chocolate coating to fully set and harden.
- Serve & Enjoy: Once set, serve your spooky Mummy Oreo Balls chilled and enjoy!
Notes
- Store leftover Mummy Oreo Balls in the refrigerator; they will keep fresh for up to 5 days.
- If stacking during storage, place parchment paper between layers to prevent sticking.
- Ensure cream cheese is softened to room temperature for easier mixing.
- If candy melts harden during decorating, gently reheat to return to dipping consistency.
- These treats are no-bake and require freezing and chilling for best texture.
Keywords: Mummy Oreo Balls, Halloween Treats, No Bake Dessert, Oreo Truffles, Festive Sweets