Hanukkah Gelt Recipe
Introduction
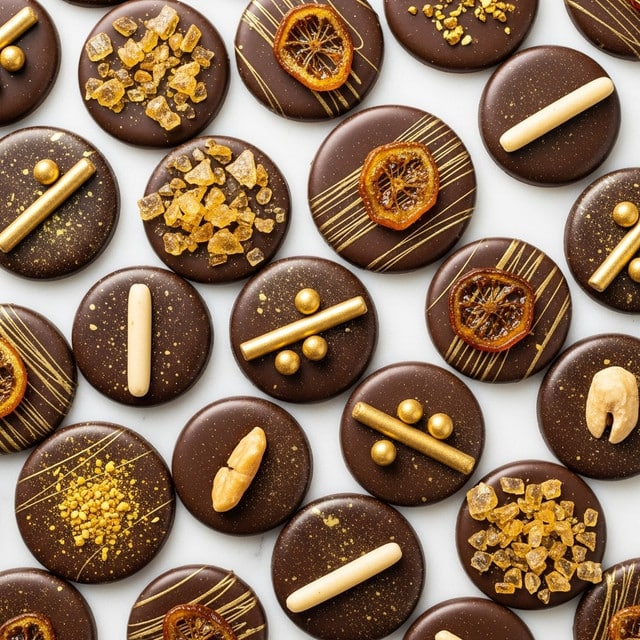
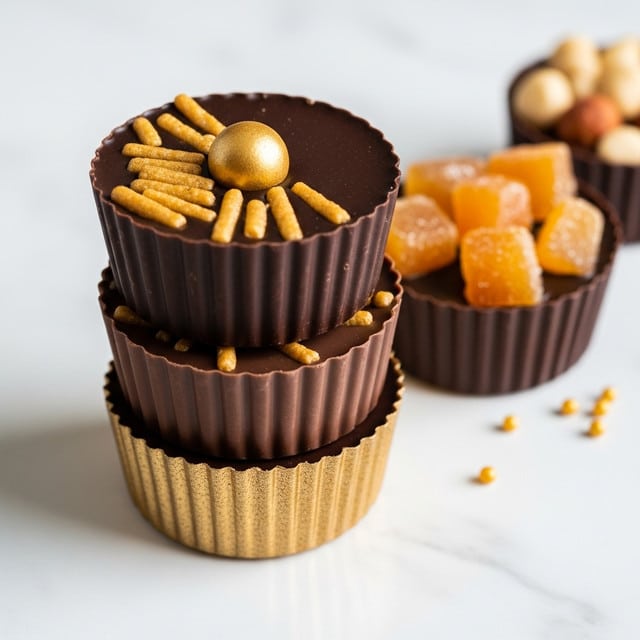
Celebrate Hanukkah with these simple and festive Hanukkah Gelt treats. Made from rich melted chocolate and adorned with optional toppings, they are perfect for sharing and gifting during the holiday season.
Ingredients
- Neutral oil, for brushing
- 6 oz. dark chocolate or semisweet chocolate chips
- 2 dried apricots, cut into thin strips (optional)
- 1 tbsp. slivered almonds (optional)
- 1 tsp. gold sprinkles or white sparkling sugar (optional)
- 1/2 tsp. coarse Himalayan sea salt (optional)
Instructions
- Step 1: Lightly brush a nonstick 24-cup or two 12-cup mini cupcake pans with neutral oil to prevent sticking.
- Step 2: In a small heatproof bowl, microwave the chocolate in 20-second increments, stirring between each until melted and smooth. Alternatively, melt the chocolate using a double boiler.
- Step 3: Pour 1 to 1 1/2 teaspoons of melted chocolate into each prepared cup, tapping the pan gently to evenly distribute the chocolate. Add your choice of toppings such as apricot strips, slivered almonds, gold sprinkles, or sea salt.
- Step 4: Refrigerate the pan until the chocolate is firm, about 10 minutes. Then, turn the pan upside down onto a cutting board and tap the back of the cups to gently release the gelt.
- Step 5: Serve immediately or wrap in foil for gifting or storing.
Tips & Variations
- Use high-quality chocolate for a richer flavor and smoother texture.
- Try different nuts or dried fruits for varied toppings, such as pistachios or cranberries.
- If you prefer, use silicone molds to make removal easier.
- Carefully temper the chocolate for a shiny finish and better snap.
Storage
Store the Hanukkah Gelt in an airtight container in the refrigerator for up to two weeks. Let them come to room temperature before serving so the chocolate is smooth and flavorful.
How to Serve
Serve this delicious recipe with your favorite sides.
FAQs
Can I use milk chocolate instead of dark or semisweet?
Yes, milk chocolate works well and offers a sweeter, creamier taste. Just be sure to melt it gently to avoid scorching.
How can I prevent the gelt from sticking to the pan?
Lightly brushing the pan with neutral oil helps. You can also use a silicone mold or line the pan with parchment paper for easier removal.
PrintHanukkah Gelt Recipe

This Hanukkah Gelt recipe features homemade chocolate coins, a festive treat perfect for celebrating the holiday. Made with rich dark or semisweet chocolate and optionally garnished with dried apricots, slivered almonds, gold sprinkles, and a touch of Himalayan sea salt, these delightful chocolates are easy to prepare and a sweet addition to any Hanukkah celebration.
- Prep Time: 10 minutes
- Cook Time: 5 minutes
- Total Time: 15 minutes
- Yield: 24 coins 1x
- Category: Dessert
- Method: No-Cook
- Cuisine: Jewish
Ingredients
Chocolate Gelt
- Neutral oil, for brushing
- 6 oz. dark chocolate or semisweet chocolate chips
Optional Toppings
- 2 dried apricots, cut into thin strips
- 1 tbsp. slivered almonds
- 1 tsp. gold sprinkles or white sparkling sugar
- 1/2 tsp. coarse Himalayan sea salt
Instructions
- Prepare the pans: Lightly brush a nonstick 24-cup or two 12-cup mini cupcake pans with neutral oil to ensure the chocolate gelt will release easily once set.
- Melt the chocolate: Place the chocolate chips in a small heatproof bowl and microwave in 20-second increments, stirring between each, until the chocolate is completely melted and smooth. Alternatively, use a double boiler to melt the chocolate gently over simmering water.
- Fill the molds: Pour about 1 to 1 1/2 teaspoons of melted chocolate into each prepared cup. Gently tap the pan to evenly distribute the chocolate and remove any air bubbles. Sprinkle with any desired toppings such as dried apricot strips, slivered almonds, gold sprinkles, or a pinch of Himalayan sea salt.
- Chill the gelt: Place the pans in the refrigerator and chill until the chocolate is fully set, approximately 10 minutes.
- Remove and serve: Once set, invert the pans onto a cutting board and tap the back of the cups to release the gelt coins. Serve immediately or wrap in foil for storage.
Notes
- Use good-quality dark or semisweet chocolate for best flavor.
- Optional toppings add festive color and texture but can be omitted for a classic chocolate flavor.
- Store gelt wrapped in foil at room temperature or in the refrigerator for longer freshness.
- Ensure chocolate is fully set before attempting to remove from molds to avoid breakage.
Keywords: Hanukkah, gelt, chocolate coins, holiday dessert, Jewish holiday treat