Pumpkin Blondies Recipe
Introduction
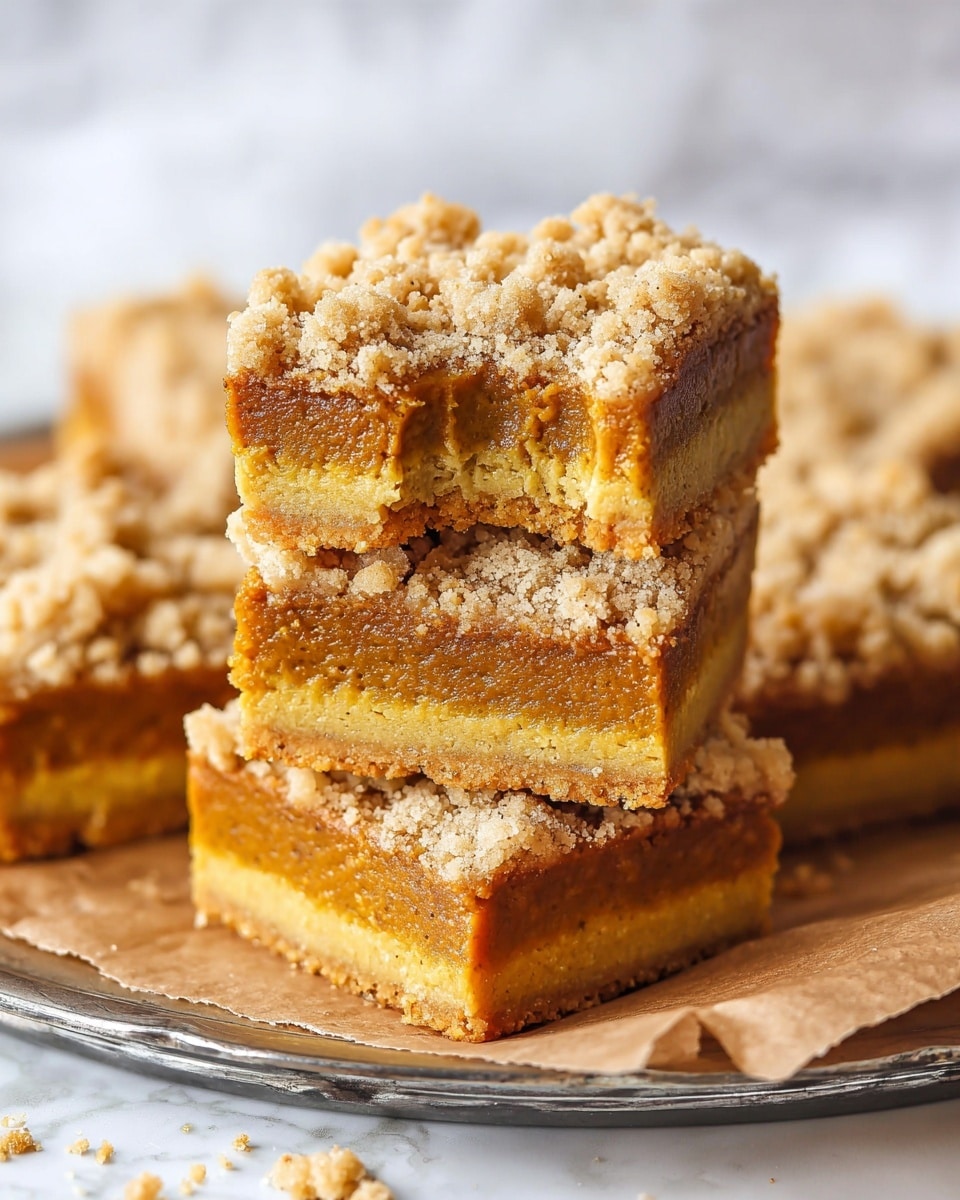
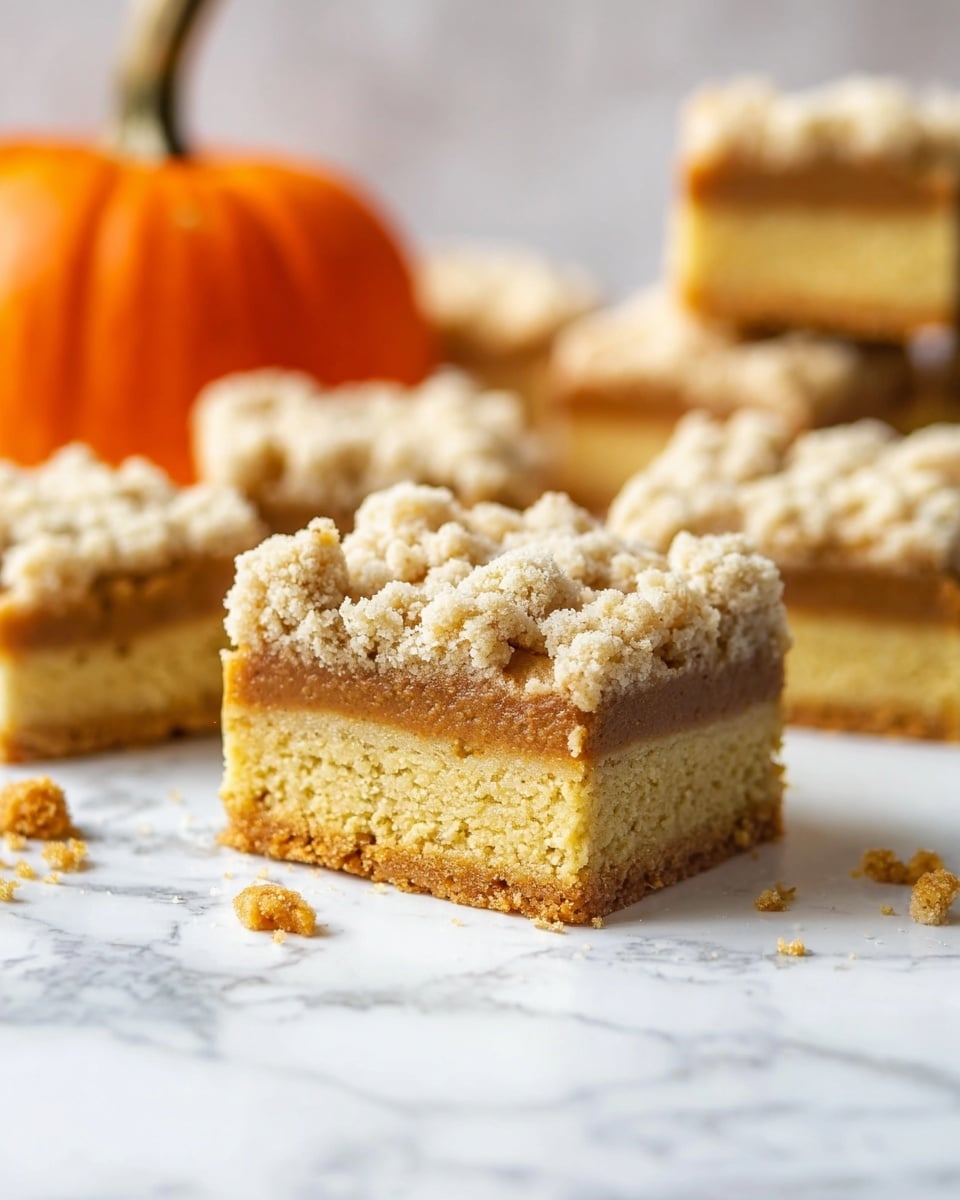
These pumpkin blondies are a perfect fall treat, combining the rich flavor of pumpkin with warm spices and sweet white chocolate chips. They’re moist, tender, and easy to make, ideal for sharing or enjoying with a cup of coffee.
Ingredients
- 1 cup pumpkin puree
- 1/2 cup melted butter
- 1 cup brown sugar
- 1 egg
- 1 tsp vanilla extract
- 1 1/2 cups all-purpose flour
- 1 tsp baking powder
- 1/2 tsp salt
- 1 tsp cinnamon
- 1/2 tsp nutmeg
- 1/2 cup white chocolate chips
Instructions
- Step 1: Preheat your oven to 350°F (175°C) and grease an 8×8-inch baking pan to prevent sticking.
- Step 2: In a large bowl, mix together the pumpkin puree, melted butter, brown sugar, egg, and vanilla extract until smooth.
- Step 3: In a separate bowl, whisk the all-purpose flour, baking powder, salt, cinnamon, and nutmeg to combine the dry ingredients evenly.
- Step 4: Gradually add the dry ingredients to the wet mixture, stirring gently until just combined. Fold in the white chocolate chips carefully.
- Step 5: Pour the batter into the prepared pan, spreading it evenly. Bake for 25-30 minutes, or until a toothpick inserted in the center comes out clean.
- Step 6: Allow the blondies to cool completely in the pan before cutting into squares to maintain their shape.
Tips & Variations
- For a nutty twist, add 1/2 cup chopped pecans or walnuts along with the white chocolate chips.
- Use canned pumpkin puree for convenience, but avoid pumpkin pie filling which contains added spices and sugar.
- Sprinkle a little sea salt on top before baking for a delightful sweet-salty contrast.
- Replace white chocolate chips with dark chocolate or butterscotch chips for different flavors.
Storage
Store the pumpkin blondies in an airtight container at room temperature for up to 3 days. For longer storage, keep them in the refrigerator for up to a week or freeze for up to 3 months. Reheat gently in the microwave to soften before serving.
How to Serve
Serve this delicious recipe with your favorite sides.
FAQs
Can I use fresh pumpkin instead of canned puree?
Yes, you can make your own pumpkin puree by roasting and pureeing fresh pumpkin. Just ensure it’s well-pureed and drained of excess moisture for best results.
Are these blondies gluten-free?
This recipe uses all-purpose flour, which contains gluten. For a gluten-free version, substitute with a gluten-free flour blend, but note that texture may vary slightly.
PrintPumpkin Blondies Recipe

These Pumpkin Blondies combine the warm, cozy flavors of pumpkin and spices with a rich, buttery base and sweet white chocolate chips, creating a moist and tender treat perfect for fall or any time you crave a festive dessert.
- Prep Time: 10 minutes
- Cook Time: 25-30 minutes
- Total Time: 35-40 minutes
- Yield: 16 squares 1x
- Category: Dessert
- Method: Baking
- Cuisine: American
Ingredients
Wet Ingredients
- 1 cup pumpkin puree
- 1/2 cup melted butter
- 1 cup brown sugar
- 1 egg
- 1 tsp vanilla extract
Dry Ingredients
- 1 1/2 cups all-purpose flour
- 1 tsp baking powder
- 1/2 tsp salt
- 1 tsp cinnamon
- 1/2 tsp nutmeg
Add-Ins
- 1/2 cup white chocolate chips
Instructions
- Preheat and prepare pan: Preheat your oven to 350°F (175°C). Grease an 8×8-inch baking pan to ensure the blondies don’t stick.
- Mix wet ingredients: In a large bowl, combine the pumpkin puree, melted butter, brown sugar, egg, and vanilla extract. Stir well until the mixture is smooth and fully blended.
- Combine dry ingredients: In a separate bowl, whisk together the all-purpose flour, baking powder, salt, cinnamon, and nutmeg to evenly distribute the leavening and spices.
- Combine wet and dry mixtures: Gradually add the dry ingredients to the wet mixture. Stir gently until just combined to avoid overmixing, which can make the blondies tough.
- Fold in white chocolate chips: Add the white chocolate chips to the batter and fold them in evenly for sweet, melty pockets in every bite.
- Bake: Pour the batter into the prepared baking pan and spread it out evenly. Bake for 25 to 30 minutes, or until a toothpick inserted into the center comes out clean or with just a few moist crumbs.
- Cool and serve: Allow the blondies to cool completely in the pan before cutting into squares. This helps them set perfectly for clean slices and optimal texture.
Notes
- Use canned pumpkin puree or homemade pumpkin puree without added spices or sugar for best results.
- Make sure your melted butter is cooled slightly before mixing with the egg to prevent scrambling.
- For a nuttier variation, consider adding chopped pecans or walnuts along with the white chocolate chips.
- Store blondies in an airtight container at room temperature for up to 3 days or refrigerate for up to a week.
- To keep blondies moist, avoid overbaking; start checking at 25 minutes.
Keywords: pumpkin blondies, pumpkin dessert, fall dessert, white chocolate blondies, pumpkin spice